Showing posts with label Main course. Show all posts

Friday, October 21, 2011

Almost Hands-Free Risotto


My aunt always used to make risotto and I remember watching her stand over the stove, drink in hand, stirring and adding liquid for what seemed like forever.  But the end result was always worth it.  As an adult, I had never made risotto until recently because I'm not a big fan of anything that requires me to stand and stir for long periods of time (I know, I'm lazy, and probably have cooking ADD).  

Then I was watching America's Test Kitchen one day and they introduced me to the "almost hands-free" risotto.  As usual, I was skeptical.  It went against everything I knew about risotto.  But again, as usual, I was wrong and ATK was right.  One of these days you'd think I would start trusting them, seeing as they test recipes hundreds of times... 

Almost Hands-Free Risotto
Start to finish: 45 minutes
Makes 4 main dish servings

3 1/3 cup low sodium chicken broth
1 cup water
1 Tbsp butter
1 medium onion, chopped fine (about 1 cup)
1 clove of garlic, minced
1 1/3 cup arborio rice
2/3 cup dry white wine
2/3 cup grated parmesan cheese
1 lb asparagus, trimmed and cut into 3/4 inch pieces
1 cup frozen, shelled edamame
salt to taste

First you will want to prepare your asparagus.  Trim the ends and cut the stalks into 3/4 inch pieces.  Bring a pot of water to boil and blanch them for 1.5-2 minutes.  This will lock in that beautiful green color and make them crisp tender.

Have you ever noticed that when you blanch asparagus, the water turns green?  I figure that some of that green must be good flavor so I actually saved this water and added chicken bouillon to make my 3 and 1/3 cup of broth and then another cup for the water.  You don't have to do that, but if you don't, you will need to bring the same amount of broth and water to a boil in a large sauce pan.  This is the liquid you'll be adding to the risotto and it needs to be hot.  

Next, heat 1 tablespoon of butter in a large skillet over medium heat.  Add onion and 1/4 teaspoon of salt.  Cook until the onions are softened but not browned, 4-7 minutes.

Add the garlic and stir until fragrant, about 30 seconds.  Next, add the rice and stir around until the edges of the rice are translucent around the edges.  This takes a couple minutes.

Deglaze the pan with wine and stir until fully absorbed, another couple minutes.  

When the wine is absorbed, add all but 1 cup of the broth blend.  

This goes against everything we know about risotto, but just do it and reduce the heat to medium-low.  Cover the pan and simmer for 15-20 minutes, stirring only twice during cooking.  Watch the progress below.

At the beginning...

 After 5 minutes

After 10 minutes

After 15 minutes

After 20 minutes add the edamame and 1/2 cup of the remaining broth mixture.  Stir gently until the risotto becomes creamy, about 3 minutes.

This liquid should be very thick, starchy and almost fully absorbed.

Next, throw in the asparagus and the parmesan cheese.  

Remove the pan from the heat and let it stand, covered, for 5 minutes.

Add salt and pepper if you think it needs any.  If your risotto gets too stiff, use the remaining broth to loosen it up.

Serve either vegetarian style:

Or with a nice sauteed chicken breast:

Monday, September 12, 2011

Bringing new life to leftovers: Taco salad

With just two people in the house, no matter what I make, I always have leftovers.  And sometimes I get sick of eating those leftovers all the time.  So every once and a while, I will take my leftovers and turn them into something else.  Today I took leftovers from my taco dinner last week and turned them into a lovely taco salad.

Taco Salad
Makes one serving
Start to finish: 5 minutes

3 oz leftover taco meat
1/2 oz of shredded cheddar
5 tortilla chips
1 small tomato, diced
2 cups lettuce, chopped
1/4 cup chunky salsa
jalepeno slices (optional)

The assembly of this is pretty straight forward.  Microwave the taco meat for 30 seconds.

Add the meat and cheese to the lettuce you will have chopped up into bite size pieces.

Don't forget those crunchy tortilla chips.  Crumble them up into bite size pieces for added crunch.

Mmm it looks good already doesn't it?

For some added color top this salad with tomatoes.  Then for extra spice add jalepenos and the salsa of your choice.  Using salsa as your dressing will be just as flavorful as regular dressing with a fraction of the calories,, making this salad healthier than some.
Such a delicious way to revamp leftovers, and it will probably take you less time to make than it did for me to make this post.  Enjoy.

Wednesday, September 7, 2011

Good Ol' Fashioned Tacos


When was the last time you had just a plain old taco?  I'm talkin' ground beef, lettuce, cheese, maybe a little salsa, all in a crunchy taco shell.  Nothing more, nothing less.  Tacos are such a simple meal, but I think because they are so simple, that people are always looking for ways to jazz them up.  You can get all kinds of tacos these days.  Fish tacos, chicken tacos, vegetarian tacos, soft tacos, taco salad...they add avocados and switch up cheeses... the taco has a major identity crisis these days.  So, in honor of the taco and all its greatness, I decided to make just plain old tacos, which is not to say they are boring, just under-appretiated.

Beef Tacos
Start to finish: 30 minutes
Makes 4-6 servings

1 lb lean ground beef
1 Tbsp corn starch
1 Tbsp onion flakes
1 tsp garlic salt
1 tsp cumin
1 tsp paprika
1 tsp chili powder
1/4 tsp salt
1/4 tsp cayenne pepper
3/4 cup water
1 box Old El Paso Taco shells
lettuce, cheddar, and salsa for topping

Brown one pound of ground beef in a large skillet that has been put over medium-high heat.  While the meat is browning, mix all the spices in a small bowl and chop your lettuce into strips.


When the meat is browned, drain the excess fat through a colander.


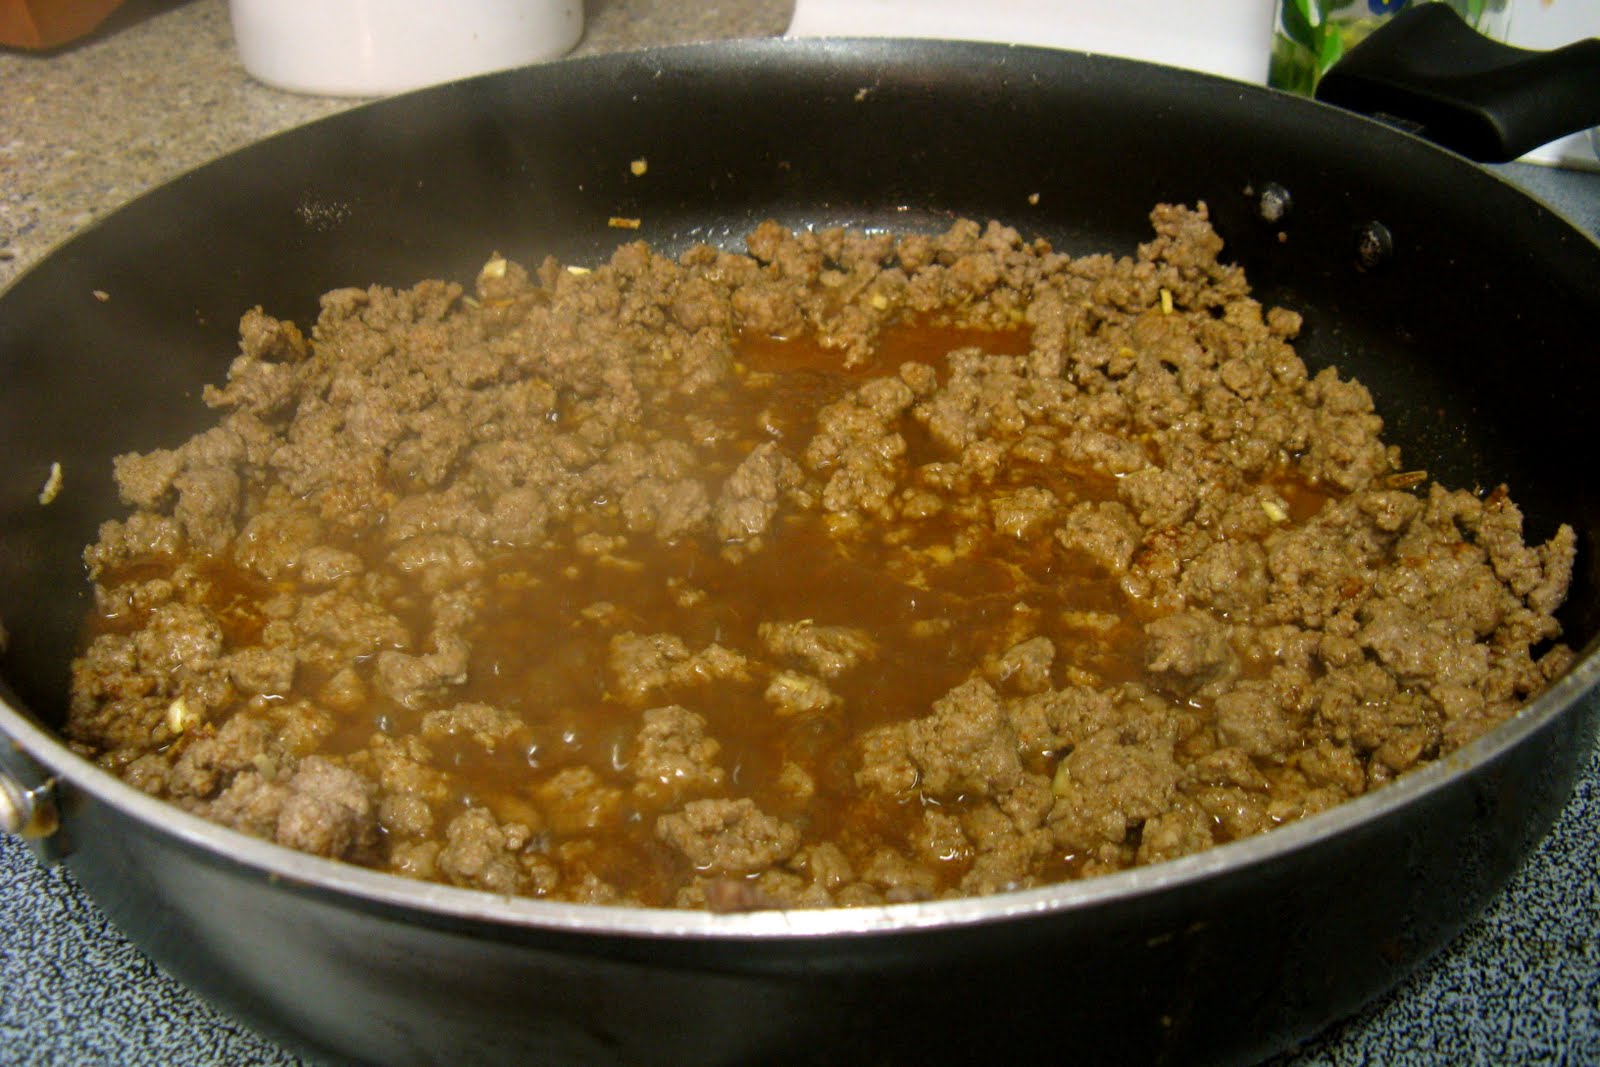
Return the meat to the pan and add the water and seasoning.  Stir until everything is intermixed.  


Bring the mixture to a boil and it should thicken into a meaty sauce rather quickly, couple minutes tops.

That's it!  Throw in some refried beans and some chips and salsa, and dinner is READY!  

A note on taco shells.  Did you know that it is possible to consume whole grain corn?  Yes, corn, like wheat, is considered a whole grain when the whole kernel is used.  For more information on how this works and what to look for, see this lovely post from one of my favorite blogs, 100 Days of Real Food.  

In the meantime, allow me to recommend Old El Paso Taco Shells, which among its four ingredients, includes ground whole kernel corn.

I hope you enjoy your simple taco dinner!  I know I did.


Sunday, August 28, 2011

Pasta Ponza


Hello my loyal followers!  I am so sorry for slacking last week.  Between being out of town, being sick, then being out of town AGAIN, I didn't exactly get much cooking done last week.  I'm still feeling a little under the weather but I got sick of laying around and wallering in my sorrows so back into the kitchen I went!

I actually made this dish a while ago, but am just getting around to blogging about it.  As the tomatoes roast in the oven, they make their own flavorful sauce that you then mix in with pasta.  I adapted this recipe. It probably would have been fabulous just as written but as you may have noticed, I am kind of a know it all, and I have to put my own twist on everything (probably why I also added chicken to this recipe).

Pasta Ponza
Makes 4 servings
Start to finish: 45 minutes

8 ounces yellow or orange cherry tomatoes, halved
1 large heirloom tomato (or another 8 ounces of red cherry tomatoes), chopped
1/4 cup capers
1 Tbsp olive oil
1/2 tsp salt
1/4 tsp pepper
1/3 cup breadcrumbs (I used Panko)
1 tsp Italian seasoning
8 ounces whole wheat penne pasta
1/2 cup grated Romano cheese
1/4 cup chopped fresh parsley
1 lb chicken breasts
flour for dredging + salt and pepper

Preheat your oven to 375 degrees and then start prepping your tomatoes.  Halve the cherry tomatoes and chop the heirloom tomato in large chunks.


If you're wondering what makes a tomato an heirloom tomato, besides their hype, they are funny lookin' on the inside.  They looked good at the farmer's market so I figured, why not?

Toss these tomatoes with the capers, salt, pepper, and olive oil.  Top with breadcrumbs and seasoning.


Put this concoction in the oven for half an hour.  While they are roasting, boil the water for your pasta and get started on this chicken.

The chicken in this recipe is quite simple.  I pounded out about a pound of chicken breasts to an inch thickness, just so they would cook evenly.  I coated them in salt and pepper and then in flour.

I heated up a few drizzles of oil in a large skillet over medium-high heat, then browned the chicken for about 4 minutes on each side.


Now, you could cook this chicken up in a variety of ways.  Afterall, you're just going to slice it over the top of your pasta.  I did this because I really think this method adds a lot of flavor, and it's not difficult at all.  When your chicken is done, plate it and cover it with aluminum foil so it can stay warm while you finish your dish.

Right about now, your timer should be going off on your tomatoes.  If the breadcrumbs are not brown after 30 minutes, turn your broiler on and let them sit for a couple more minutes.

Simply spoon this make-shift sauce onto the pasta that I know you cooked to al dente and drained, right?  Don't leave any of the syrup-like tomato juice at the bottom of the pan.  That's where the flavor is!

Next, add the Romano and parsley, and toss it all together.


Last but not least, slice the chicken and sprinkle it on top.
I have to be honest, I did not think this meal would be anything special because the ingredients are so simple but WOW.  (That's the word I kept muttering as I ate this bowl and it takes a lot to render me speechless).  But don't take my word for it!

Monday, August 22, 2011

Pulled Pork Sandwiches


Good barbecue is so subjective, and it's all based on the sauce.  If you've got a good sauce, you could slather it on just about any cut of meat and make it taste good.  If you don't have a good sauce, nothing will save you.  But what constitutes a good sauce?  Ask any cook and he/she will tell you something different, especially as you travel through different parts of the country.  Not only that, but some people will argue that different types of meat warrant different types of sauce.

I have tried about five different sauce recipes for my crock pot pulled pork sandwiches and I think I have landed on one that it worth sharing.  Like I said though, good barbecue is in the eye of the beholder, so you will have to judge for yourself.

Pulled Pork Sandwiches
Makes 6-8 servings
Start to finish: 8 hours

2-3 lbs pork roast (shoulder is traditional, pork loin is leaner)
1 large onion, quartered and separated
1.5 cups ketchup
1/4 cup packed brown sugar
1.4 cup apple cider vinegar
2 Tbsp dijon mustard
1 Tbsp Worcestershire sauce
1 tsp liquid smoke
1/2 tsp salt
1/4 tsp pepper
1/2 tsp of garlic powder

pickle slices

Place the roast in your crock pot with the onion pieces.

Mix together the ingredients of your sauce in a medium bowl.

Pour the sauce over the pork. (it will be thin as far as sauces go but the liquid will be absorbed by the pork)

And then just put the lid on and let it cook on the LOW setting for 8 hours.

Now, I don't know about you, but I can never leave something in the crock pot for exactly 8 hours.  Chances are I am doing this before work and the time between when I leave and when I get back is more like 9-10 hours.  In my old crock pot, this would make everything dry and overcooked.  But, no more.  Not with my new crock pot.

I registered for this when I got married.  You can choose to program it for a desired amount of hours, and then when that time has elapsed, the slow cooker switches over to warm.  You can also insert a thermometer and program it to stop cooking once the desired temperature is met.  No more over-cooking!  Best crock pot ever.

Now, that being said, I personally think the meat keeps cooking a little even after it changes to "warm" so I will often shorten the cooking time by half an hour or so to compensate.  So, if you have a programmable slow cooker, try 7.5 hours.

When you get home, that smell in the air is your beloved pork roast.  Take the lid off and shred the meat with a large fork.

There will be juices at the bottom so make sure you incorporate all those into the shredded pieces.

You are not probably ready to eat as soon as you get home, so pop the lid back on and let the pork sit on warm until you are ready to sit down to dinner.  This extra time will allow the juices to soak up into the meat.

When it's time to eat, pile your meat onto a hearty bun that won't turn into soggy mush and top with pickles.

I served these sandwiches with fries and salad.  Baked beans would also be good.